
Overview

Feedburner is one option for addressing the limitations of Blogger's "native" feeds, and also for allowing some extra things to be done with a feed - for example converting it to HTML.
Although Feedburner is owned by Google now, it was originally a different company so the way to set up a feed is a little different to the method used for other things in the Google suite of tools.
That said, getting started with Feedburner is actually very simple. You just:
- "burn" (ie create) a feed from your blog (or other website),
- put something in your website that lets your visitors choose to subscribe to your feed.
This article is about the first step, creating the feed.
Making a Feed in Feedburner
Follow these steps:1 Go to Feedburner: http://www.feedburner.com/
2 Log in, using the same Google account that owns your blog.
Feedburner doesn't enforce this: you can burn feeds for websites, blogs etc that you don't own. But if you are interested in managing the rights of your blog overall, and in particular if you may want to give it to someone else to manage, it's very helpful if the same account owns all the components in your blog.

NOTE: if you have added the Follow-by-email gadget to your blog, then you will already have created a feedburner "feed" for it. You can find out if there is one by looking on the screen that's shown when you log in to Feedburner. If you do have a feed then you may want to continue using it, rather than set up a new one.
3 Enter your blog's URL in the "Burn a feed right this instant" field
4 Press Next
5 Choose a feed source:
Because Blogger's current standard is to provide two feeds for each blog (one in Atom format, one in RSS format), Feedburner will show you a message saying "Feedburner discovered more than one feed at that address", and asking you which one you want to use.
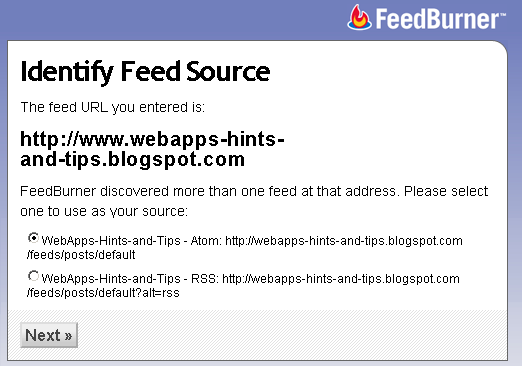
Currently, I don't know any advantages of using either one, so I generally leave it on the default (ie first) option.
6 On the next screen, you can change the suggested values for the the feed's title and part of it's URL.
- The title is the name that the feed will be known as in your Feedburner account.
It's possible to burn more than one feed from the same blog, if you want different features on different feeds. If you're going to do this, make sure you use names that are meaningful to you. - The URL is the one that feed-subscribers need to enter into their feed-reader-software to subscribe to your feed: this isn't normally seen by human-beings so doesn't need to be meaningful - Feedburner generally makes it a "tiny-URL" style of abbreviation.

7 Feedburner then creates your new feed, and shows you a congratulations message.
This message includes the name of the feed. Theoretically you could share this with your audience, but I've noticed that sometimes it has extra spaces it in. It's far better to wait and use the tools from the Publicize tab to share your feed with your viewers.
8 You are given the option of adding some extra free statistics: I generally turn these on because they're free and I haven't found any reason not to have them.
(You could turn them off if you viewers complain that your feed is slow to work with, but it doesn't usually seem to happen.)
Next steps
Just creating a feed from Feedburner isn't actually very useful - your blog was already publishing feeds anyway. The benefits come from using Feedburners tools to promote, manage and monitor use of your feed. You can access these from the main Feedburner screen, which is where you are taken after your feed is made. The options are grouped into the Optimize, Publicize, Moneytize and Troubleshootize tabs.
Feedburner sometimes shows some "cute" phrases on the screen, and uses quirky words to describe things, eg "troubleshootize". This is because the product was originally totally separate from Google and the company developed its own way of doing things. When Google took over, some things become more standard, but this wasn't one of them.
There are lots of things you can do with your feed. But the first and most important steps are:
- Making your Feedburner feed available on your blog
- Making an email-subscription available on your blog
Related Articles
Components in your blogWhy an RSS feed is important to bloggers
The Follow-by-email gadget: an easy way to make a feed from your blog
Making your Feedburner feed available on your blog
Making an email-subscription available on your blog
Providing social proof, by enabling the Feedcount button
Understanding Google accounts
Tools for applying copyright protection to your blog
Putting a Facebook "Share this" badge on your blog.

Do you know how to put the - feed from rss reader to display below post? pls help
ReplyDeleteThis article tells you how to put a twitter button into the post footer. But you can use the same principle to put other things, eg the subscribe code, into the same place.
ReplyDeletehttp://www.bloggersentral.com/2009/04/adding-tweet-this-button-into-blog-post.html
Thank you very much. I want to put a subscribe by email on "Pages" and thus couldn't use the "widget" function, as that will put it on my home page. So this was very helpful.
ReplyDeleteis this Feed burner service is free..?
ReplyDeleteFeedburner made easy! Thanks!
ReplyDeleteHi we have the follow by email gadget on the blog and I am signed up and used to get the email but some time back it stopped we have the RSS feed on "full" but still no emails arriving.
ReplyDelete